Quick guide:
- Create new page -
It is best to look at this page in edit mode. Then you can immediately understand what is meant. To try it out, it may be worth creating a Test page to Create and then simply delete them again.
Create content
One page consists of individual blocks. This here, for example, is a "paragraph" block, the block above it is a "heading" block
New blocks can be created using the "+" button. Either the blue one at the top left, or by moving the mouse between two blocks or by pressing "Enter" and writing "/" in the new line.
Heading 1
Heading 2
Heading 3
Heading 1 (H1) Is the Page title and should only be used once on the page. There is a small special feature here. The page title (with the color gradient) is not displayed by default on the published website. If you want this, you must use the "Title block" on your page so that it is displayed twice in edit mode.
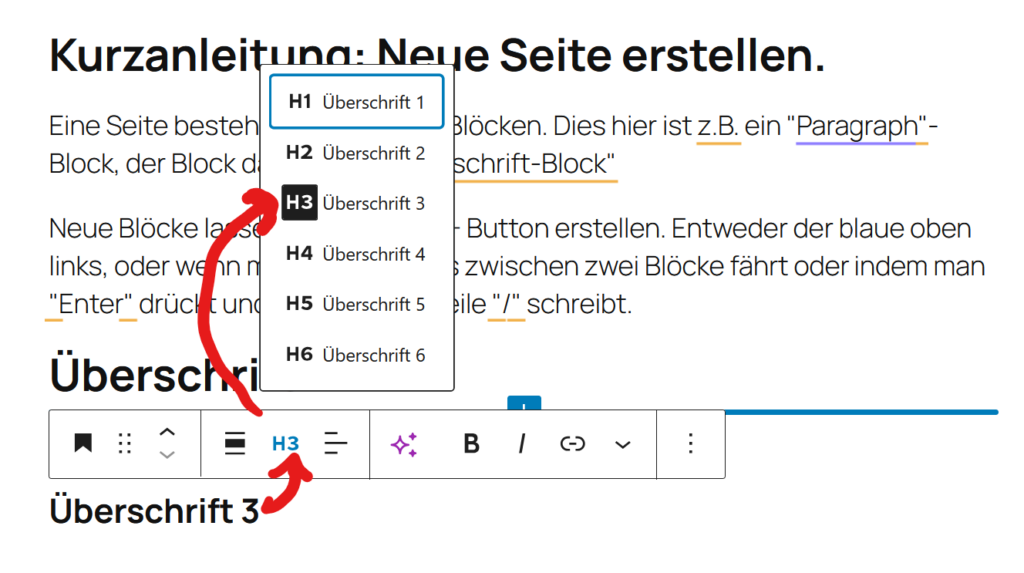
In order to Setting the hierarchy of headingsClick on "H2" in the block menu and then select from the list, see image.
Insert background boxes
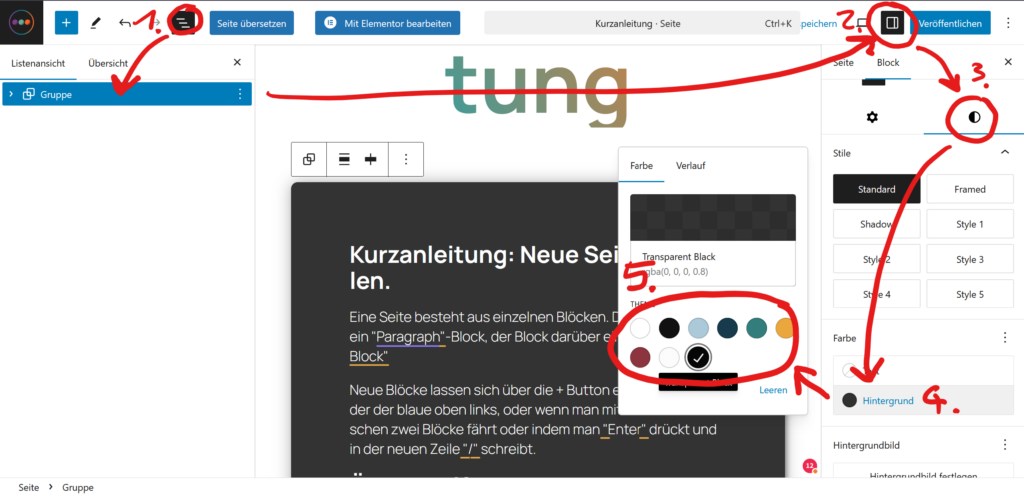
So that the content is not displayed directly on the colored background image of the website, we must Put all blocks in a group and give it a background color.
- The Open list view and select and group all elements (using the 3 dots or "Ctrl + G"). Make sure that at the end the Group selected is.
The list view is generally very helpful for maintaining an overview, especially when blocks are nested. - Open settings. Here there are settings options for the entire page or the selected block. We need the latter.
- In the block settings "Style rider" select
- Background select
- Black & white at the end of the color palette have the typical slightly transparent background.
Design
Font colors, spacing and special effects can also be controlled via the block settings. There are two contact points here.
Toolbar
- Selects the parent block
- Displays the symbol of the current block. The block type can also be changed here (e.g. paragraph to heading)
- Moving the block
- Now come block-specific options such as Text alignment, links, bold text...

Styles sidebar
Here you can Text color, styles (such as the club in the "separator block") and Distances can be set. It is also possible to set special styles for the group block, among other things
Tips and tricks
Copy & Duplicate!!!
Whenever possible, copy the blocks from another page and then replace the content. This way you only have to deal with very few things. (Ctrl + C > Ctrl + V)
If you need a block several times, you can also duplicate it with all its contents (Ctrl + Shift + D)
The List view helps really enormous here ![]()
Heels
Each time you press Enter, a new block is created.
To prevent this, "Shift" (upper case key)
pressed
hold
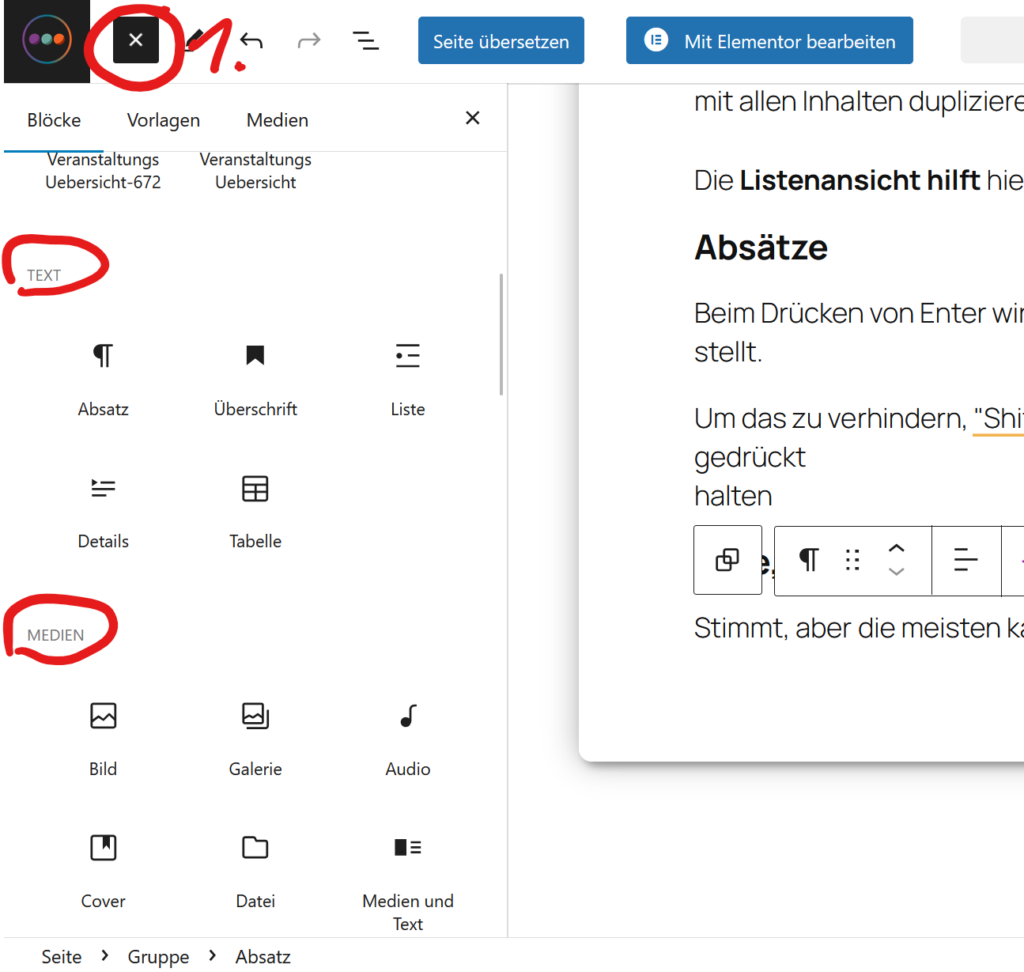
Help, the block selection is too big for me!
Understandable. If you open the block overview, you can get an overview. You only need to select the blocks under "Text", "Media" and "Design. You can safely ignore everything else.
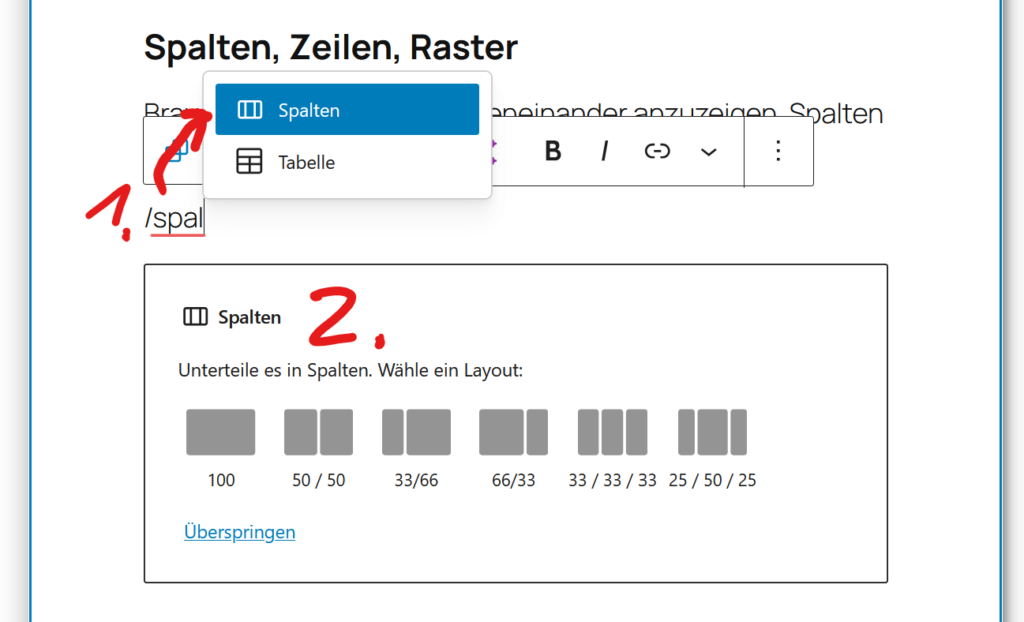
Columns, rows, grids
Do you need to Display content side by side. Columns are the easiest to use.
- Create column block (also works with the blue +)
- Select layout. To move blocks in columns, the list view is again very helpful. A look at the toolbar also provides options such as aligning the content (top, bottom, center...).
For buttons, the link is added via the link symbol (or Ctrl + K).
Lines work in a similar way, except that they do not have fixed widths. Grid are roughly comparable with dynamic tables.
Readability
Nobody reads a long block of text [insert current year here]. Whenever it makes sense(!), use visual structuring like:
- Headings at different levels (H2, H3...)
- Lists
- Boldface relevant places
 Pictures
- Heels
- Buttons instead of normal Links
- Background colors of individual blocks
Publish
Is relatively easy via the corresponding Button top right.
But before that, it is worth Control view about the finished page, because the page in edit mode does not always look exactly like the public page.
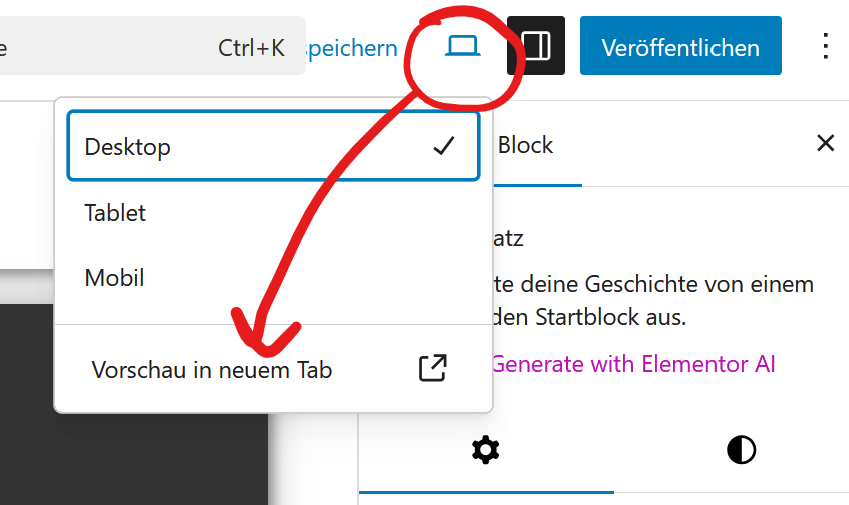
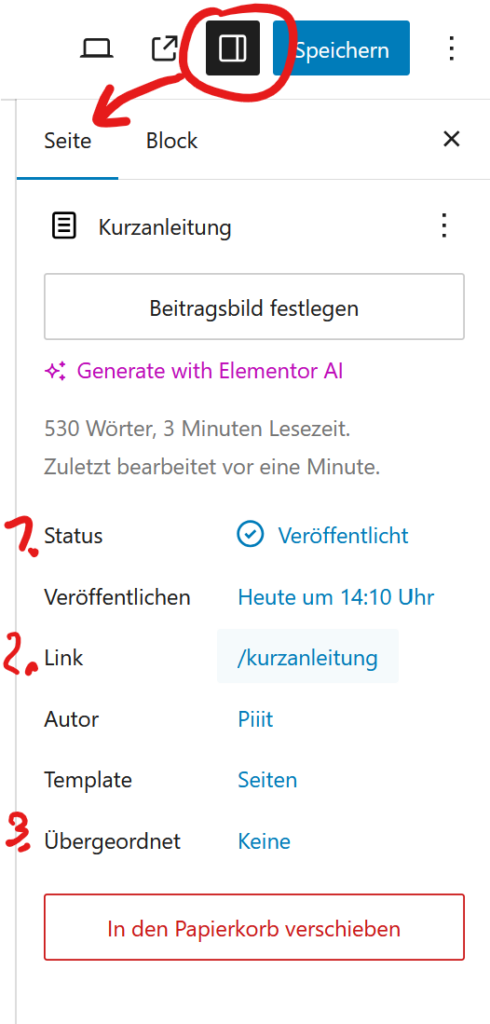
- Here you can set, for example, that a page Private or as a draft is saved so that it can no longer be displayed without having to delete it
- Here the Linkunder which the page is displayed at the end.
- If the page has a Underside of another page there is an option here.
Problems & questions
Not everything always works as it should. Some settings, for example, have no effect. There can be two reasons for this. Either a bug or this setting is overwritten by the higher-level website display settings.
Please send problems of this kind or simply questions, preferably directly with a screenshot: